BATHROOM
The renovation in this room included:
- Gut from ceiling to floor joists
- Closet and Wall removal
-
Window Replacement
- Rewiring/Re-plumb
- Ceiling medallion, tray ceiling and crown moulding
- MDF Wainscoting and tile floor.
When we bought the home 2 things were guaranteed. We would never use the bathtub and we would never use this toilet. This was the first gut remodel in our home. Our shower was a cheap unit we bought and installed in the basement next to the oil tank ....which seemed more sanitary than this bathroom. Existing 300lb cast iron tub left the 2nd floor via a push off the rear porch roof. I'm sure our neighbors loved to see that. There is a indentation in the grass that I just cant level out.
BEFORE

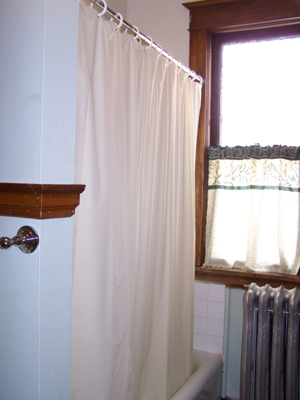
There was a wall between the sink and the bath tub. Bath tub was a cast iron with skirt and weighed 300 pounds. Pedestal sink had no antique value and was not original. Smell of mold coming from behind the bath tub surround hinted of a bigger problem. The window had decorative fern glass which we kept for later use in the kitchen cabinets. The radiator we swapped out for the smaller one in Maddy's Room.
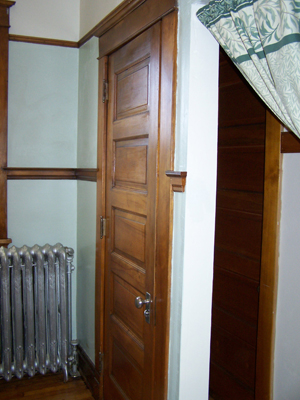
What you see here is a opening of a wall into a closet from the bathroom side. There is a door from the bath and then a door to Madeline's room. It was originally a slim closet/passageway to the connecting bedroom. We would eventually remove the interior door and the remaining wall to open up the bathroom and make it bigger.
DURING
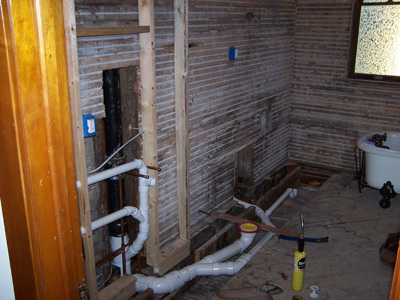
New plumbing installed on the left. Notice all the joist notching for the plumbing. This was done when it was originally built. Notice the 2 foot section missing where the angle 3" waste line connects to the main soil pipe. "Its lasted a 100 years" the inspector said before he gave us the green approval plumbing sticker. I ended up re-inforcing those joists with steel since we removed the wall below it in our kitchen remodel. Picture on the right shows the closet wall removed. All the floor planks were eventually removed to shave/shim the joists and level out the slight dip where the wall was.
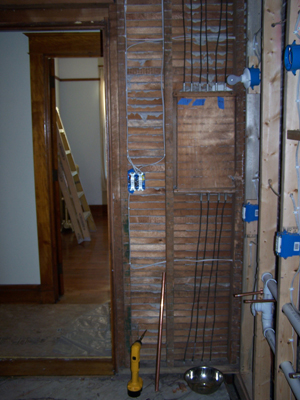
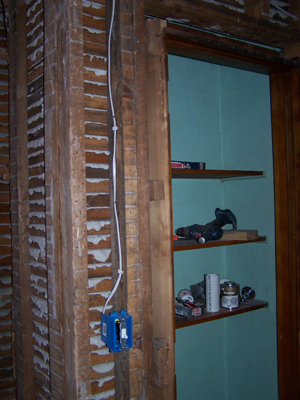
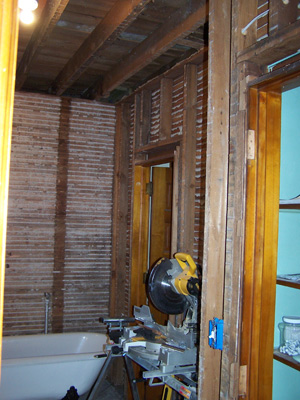
Outside the bathroom wall was a small access panel in the hallway but we couldn't get it open. It ended up being a knob and tube junction for the second floor. So much for the second floor wiring being newly updated. The new romex wiring actually came into this access panel through the side and connected to the knob and tube via a junction box. First order of business was to eliminate all knob and tube wiring in the whole house. Notice the yellow screw gun on the left and the green screw gun on the right .......which both have joined the list of burned out tools. Burt
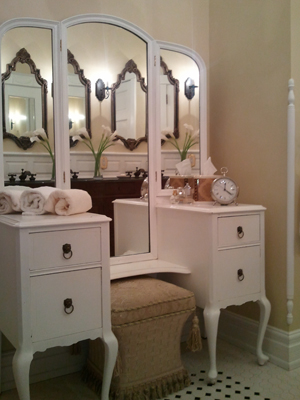
AFTER
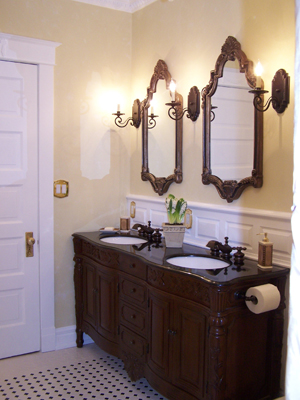
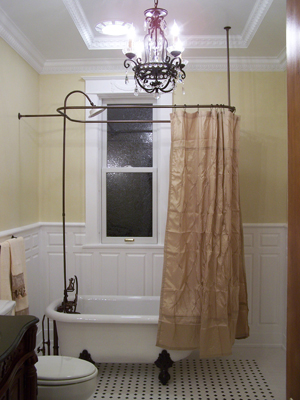
For us the bathroom had to be sanitary and clean and nothing says clean like white woodwork. This was a big decision to paint the wood, but it was only birch to begin with. The wainscoting was made using MDF in a style matching the first floor dining/foyer. New Renewal by Andersen window with matching Fern Glass to original. Acrylic claw foot tub with British telephone wand. Floor is Mosaic octagon tile. 3 wall sconces, a small chandelier and a shower light make the room very bright. Dimmer switches were used on the sconces and chandelier to control the electric meter.
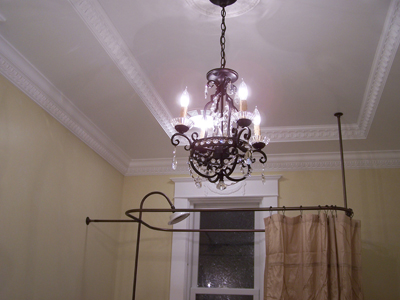
Lets add some more crown moulding to our house...
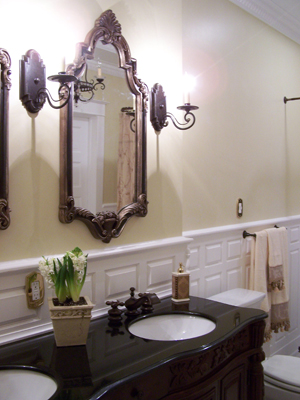
We used widespread tea pot faucets for the double vanity.
BACK TO INTERIOR REMODELING