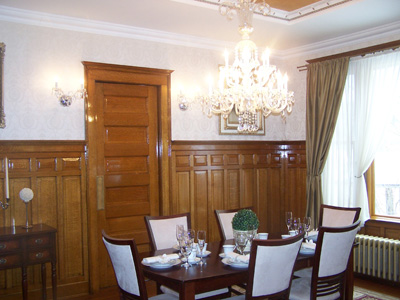
DINING ROOM
The renovation in this room included:
- Wallpaper replacement,
- New ceiling drywall and paint, including the coffered ceiling build
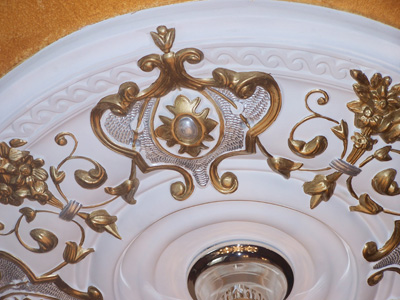
- Crown moulding and a hand painted medallion
- Faux ceiling finish
- Rewiring/Light fixture replacement and new wall sconces
- Floor refinishing
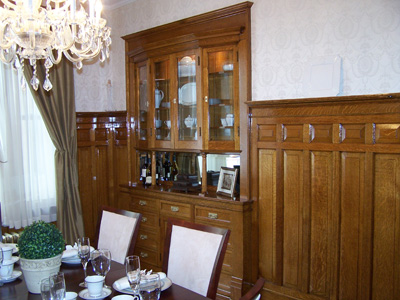
- Cleaning and poly on the woodwork
Is seems as the dining room was a project in progress for the longest time. Actually, we had just finished cleaning the woodwork in 2011.
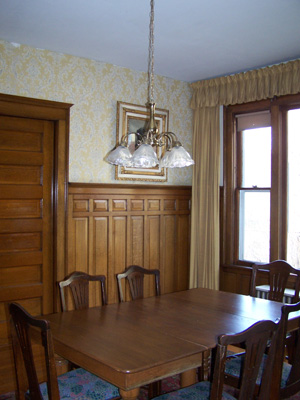
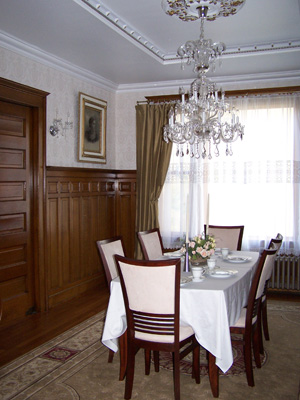
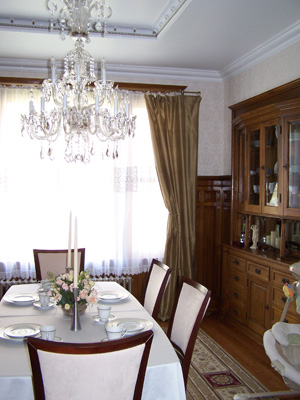
It's a very formal room, and that's how we intended to keep it. How old and neglected it was you can see from the photos. New drywall was installed on the ceiling by the previous owners, which was left unfinished at the edges with large gaps and dust just falling everywhere. The wallpaper was very interesting. Believe it or not, there were squares of wallpaper missing behind the photos and the entire wall behind the curtains was completely bare. I guess that is a good way to save money in the old days. The wallpaper had to go. The drapes had to go. The light had to go. It was by far the darkest room in the house because of the woodwork.
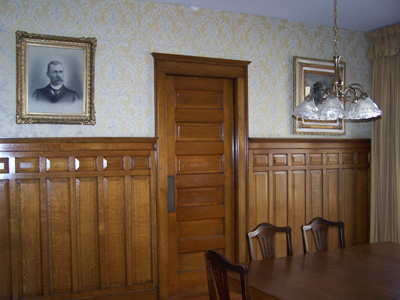
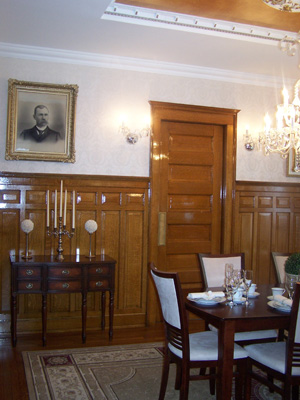
The photos on the walls in the dining room are of Mr. and Mrs. Porter, the original owners. We inherited these pictures when we bought the home. We thought it was kind of creepy at the beginning, but when we took it down to renovate, we just couldn't wait to put them back up. Hopefully the original owners are pleased with a final result.
Here are some of the before and after photos.
BEFORE
DURING
We decided to drop the ceiling around the perimeter, and install the crown around the room and center. It seems, like something was still missing.
AFTER

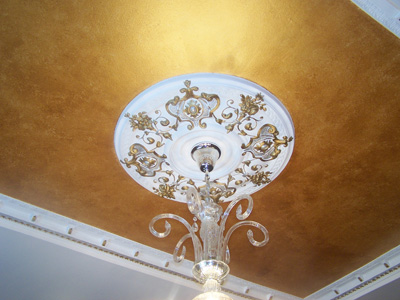
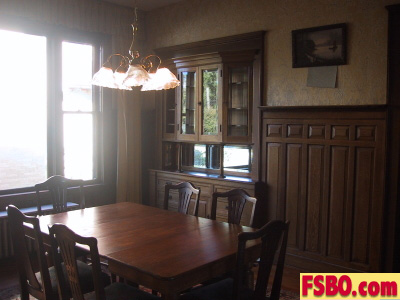
As it turns out...... what was missing was the faux finish. Being on the internet all day, one day I found a photo of a room with a gold finish. I LOVED it. I told Burt we need to do it. I should have remembered that painting was my job in this house... it took hours of upside down painting. I used a natural sponge to blend in the gold paint. We love the effect and the glow that reflects off the chandelier.
Yes, do not forget that as a painter in the house, I also needed to hand paint the ceiling medallion (and 10 more throughout the house). It required hours and a very steady hand. Don't believe any of Burt's comments that it's super easy... I think next time, I will just have him do it:)
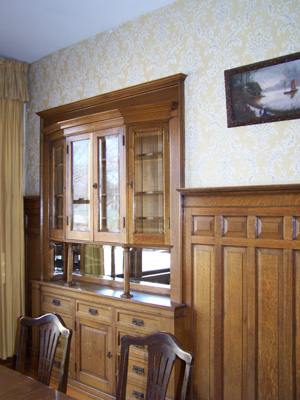
"The dark room became the brightest room with a 18 - 40 watt bulb chandelier and two sets of sconces. I had to wire the chandelier on its own circuit. The hutch also was wired with 3 dimming under cabinet lights inside of it. Perfect place to run the wire was in the newly trayed ceiling. My wife liked the crown in the parlor so much, she thought it would be a good idea for two sets of it in this room."Burt
BACK TO INTERIOR REMODELING