POWDER ROOM
No need to list what we done in this room, It would take too long to list. Let's just say... we started over on this one.
BEFORE
Hmmm... where should we start. Well maybe that the before pictures are not very good and if you looked at the walls, the drywall was put right over the plaster and the gaps were filled with caulk (screws sticking out of the wall)... The floor was gross and don't forget the peacock wallpaper. The only light fixture hanging from the ceiling never worked, so you had to crack the door when using it at night. The toilet sits directly in front of the door and the door has a really large glass window which is not very obscure. Let's just say that our fist couple visitors were brave. No doubt, everything had to go and when the kitchen remodeling project started, it was time for the powder room to change as well.
The powder room and the kitchen are adjacent on two walls. The image you are looking at is taken from the kitchen and the back wall is actually a bathroom wall that separates the dining room. In the kitchen we had a broom closet, that was not used much. Taking the closet out allowed us to move the toilet back away from the window in the door. We were able to move the other wall of the bathroom back into the old butlers pantry. With 6 bedrooms, we had only one full bathroom and saw an opportunity for another full bathroom. Currently, the powder room has plumbing in for a future claw foot shower tub, just like in our second floor bathroom.
AFTER
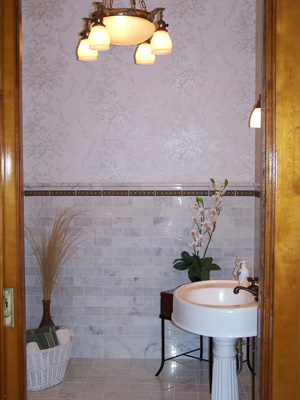
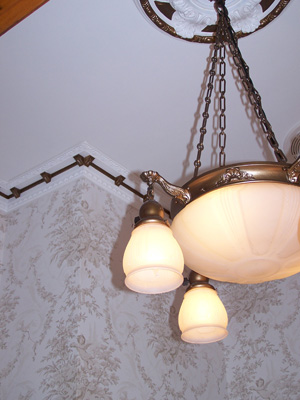
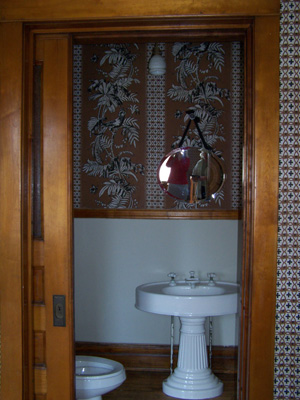
The light fixture hanging happens to be the only fixture we were able to salvage and believed to be original when the electrical was installed. It was originally in the living room. From what I learned with the grand staircase chandelier mishap, I was confident I could re-wire this fixture also. We painted it gold and hung it in the powder room.
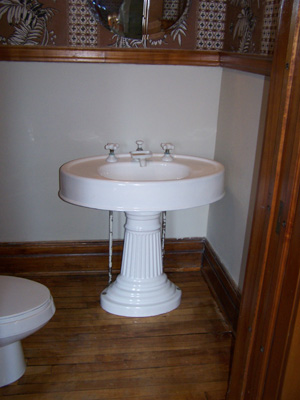
We loved the old pedestal sink, it had to go back, no questions asked. We had it refinished by a professional... Well as it turns out not every professional really knows what they are doing. We got it back and It looked horrible. Drips everywhere and around the drain, it was not even cleaned before painting! Even with a pound of putty, you would not be able to stop the leaks. So with our perfectionist natures, we took it apart, off to the basement, fired up the metal grinder (it's cast iron) and Cleaned it all up and re-enameled it ourselves. The powder room has the most salvaged fixtures...the pedestal sink, the light fixture, and the mirror hanging on the wall.
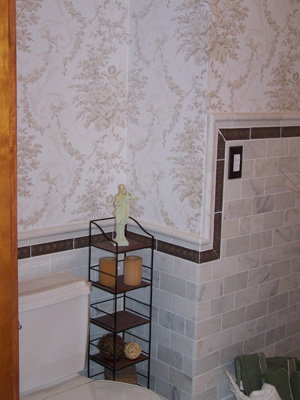
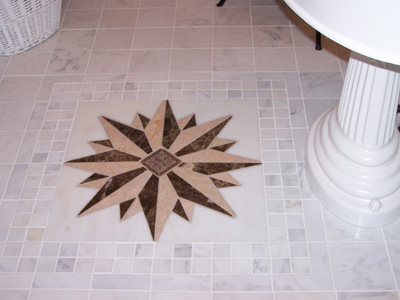
The story of the marble
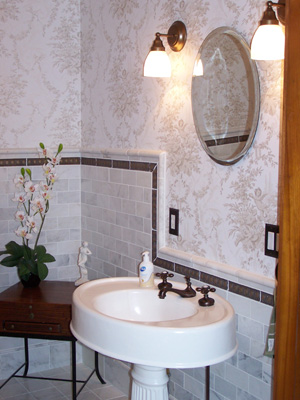
We wanted the powder room to be nice since it will be the "public bathroom".
What can be more fabulous than marble if you ask me? I wanted to have have a marble floor, no matter what. Give that idea to Burt and it turns into marble "floor to ceiling". We just spent "a lot" on the kitchen remodeling and our budget was definitely in question. (Burt never has a budget by the way). We compromised at a half wall, since eventually, there will be a tub installed.
The only way to get a marble tile on a budget was of course local big box store. Burt loaded up the truck, we got it home, and installed the floor. Floor looked awesome, nice, white and sparkly. Then we started installing the matching brand subway tile on the wall.....and a......well........it was not quite a pristine white marble as the floor. In fact it was getting darker with the more tiles we installed. We were about half way done with the toilet wall area, when we decided to tear it all down, which of course included the drywall. Maybe it was just a different Lot Number or maybe it was packaged wrong?.......well..... We went to all 5 surrounding stores spanning 150 miles to find the subway tile is just not the same color. Since the 4x4 floor tile was the color we wanted, we thought of a brilliant idea... how about we buy more floor tile and cut it in half. With the 100 pieces we filtered out of our journeys and deemed them white enough from the subway tile, we only had to cut about 100 pieces for the wall. Since the blade thickness didn't allow us to have identical halves, we could only use 1 side. We learned to look through every box now before we buy tile.
"Making the tile inlay was fun. Trying to cut marble on the angle and not have it break ...especially Marble with veins through it, is tough. I tried to convince my wife we needed a water jet but she wasn't buying into it :) I went through several boxes of tile and was down to the last tile to make the last piece. At least I got a new Tile Saw out of the deal." Burt
BACK TO INTERIOR REMODELING