CLEANING THE WOODWORK
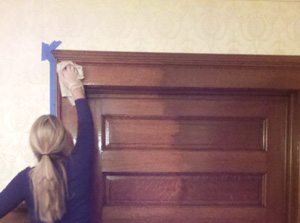
No....this door is not plain dirty. This pocket door has been cleaned multiple times with soap and water, wood cleaner, etc. This is exactly how the millwork looks in the entire house (even more "dirty" in some rooms). We thought it was fabulous and shiny when we moved in, until we discovered what lies beneath.
If you decide to try this tip, please be aware that some varnishes and waxes pre-1979 can contain lead. All of ours did. Care is needed around small children. Please see your States Department of Health for proper clean-up.
Get a big bucket of clean, warm water, and disposable soft cotton cloth. You will need gloves as well. The secret ingredient is Super Clean - the car engine deagreaser in a purple bottle, that can be purchased at most auto stores and box stores. Avoid contact with skin and eyes!
The Super Clean goes directly on the cloth.
Rinse the surface with a new clean cloth and clean water. Allow to dry well before polyurethane.
This will not clean the wood after the polyurethane has been applied. We cannot guarantee that it will work on your wood. But it may be worth to try. Rubbing achohol was our first cleaner but it was tough and the results were mixed.
CLEANING THE DOOR/CABINET HARDWARE
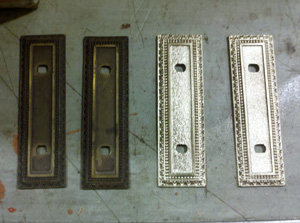
The theme of the plates presented on the picture was carried throughout the entire house. You could see that exact design and pattern on door knobs, door bells, hutch hardware, etc, which was an Egg and dart. Brass cleaners and toothbrushes were not able to get in the small crevices and clean it..
All of the hardware items are solid brass. I have a fine wire brush wheel and a buffing wheeel installed on my bench grinder. For the hammered barss items I used the wire wheel, for the smooth finish, used the buffer wheel instead. The wire will not work on brass plated hardware as it will remove the plating.
After the hardware is cleaned, it needs to be sealed, otherwise, it will tarnish again.
I found that the best way to seal it is to use clear aerosol spray lacquer, applying 4-6 coats.
CROWN MOULDING INSTALLATION
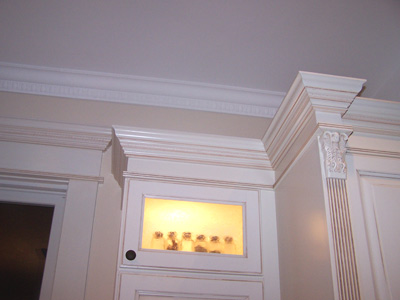
After installing crown moulding in most of the rooms, and in some rooms multiple sets of crowns, I think i have a system that works for me. For the inside miters, I cut all the moulding pieces upside down on a miter saw using crown stops on the saw at the angle that the crown piece will be sitting on the wall. The wall side or bottom edge goes against the fence and the ceiling side on the bottom. Which side is down? The decorative side (Egg and dart, dentil, ogee edge, or just the added bevel) on the crown is always the bottom side of crown. I use the DeWalt cutting guide which you can find on the internet to keep your angles and saving sides straight. I measure the angle of the corner on the wall and divide it in half for my saw degree. I cut a 2 foot practice piece for the left side and I mark what angle i cut the the piece with. I mark it right on the cut edge. I cut another 2 foot practice piece for the right side. Now I need to make marks on the wall to know where my crown bottom edge will be sitting. I measure off the ceiling which is the same measurement as taken when the crown was sitting on the saw table.....which is the height of the crown up the fence. This will mark where my practice pieces will line up to and I check the miter joint. I adjust my cut angles as needed on the practice pieces until I am happy. I mark the degree on the wall in the corner so when I come back to it when cutting the large pieces I will not forget what the angle was. I make marks across the whole wall so my crown piece will run straight and consistent. Always use practice pieces and it will save you head aches, ugly miters and allot of money (Especially if it is special order in 8 piece minimum quantities). White is a little more forgiving than wood. Always liquid nail the crown and tack nail in place and I always glued my miters.
MAKING A MOLD
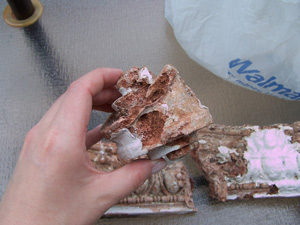
We have a total of 4 dormers, with two that have small columns in them. There are 2 - 6" square end columns and 2 - 4" round columns in the middle...... in each of the dormers.
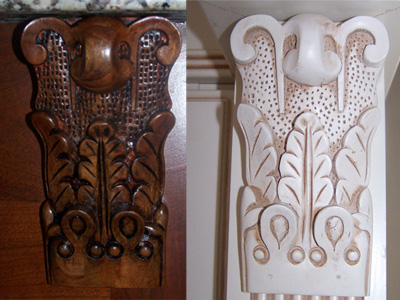
This dilapidated clay Ionic Scamozzii Capital is what we were left with after removing the column tops. We had to find a way to restore it. Of course, we could just buy new ones, but It was very hard to find exact size matches, and apparently, small columns like these, are not very popular anymore.
We were able to have the square one made by decorators supply. We were able to salvage two of the round column tops- however only one side of each was salvageable. We used two halves - glued them together and made a master mold.

Here is how the mold making is done:
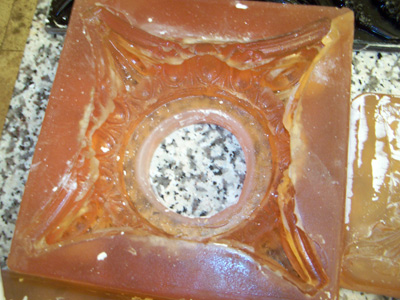
We take the piece we want to copy, and spray it with a release agent. Build a box around it and pour a 2 part urethane casting material around it. Carefully remove the original copy and you have your mold.
From that mold we are able to cast as many castings as we want as long as we don't ruin the mold. You have to use a release agent to remove the castings.We used wd-40 as our agent. We use Hydrocal Plaster/cement as the casting material. Clean with soap and water, prime and paint. Sure beats the fired clay and horse hair they used in the old days.

Our main goal is to add many decorative onlays to the house to create our painted lady. Buying them all seperate would put us in the poor house so the mold making process was our solution.
KITCHEN DECORATIVE ELEMENTS
Identical carvings, but not identical pricing
We learned a valuable lesson with our kitchen re-model. After pricing all the tulip feet, acanthus onlays, crown moulding and fluted counter-rop legs.....we found out how expensive all that decorative wood added up. Short of making them ourselves, we found the best solution for our budget was to order extra stain and glaze from the cabinet manufacturer, and order the miscellaneous items online for 1/3 the cost and stain them ourselves. In the picture...the acanthus onlay on the right costed $99.00 from the cabinet manufacturer and the cherry one on the left was $30.00 online.